Arduino Hall Effect Switch

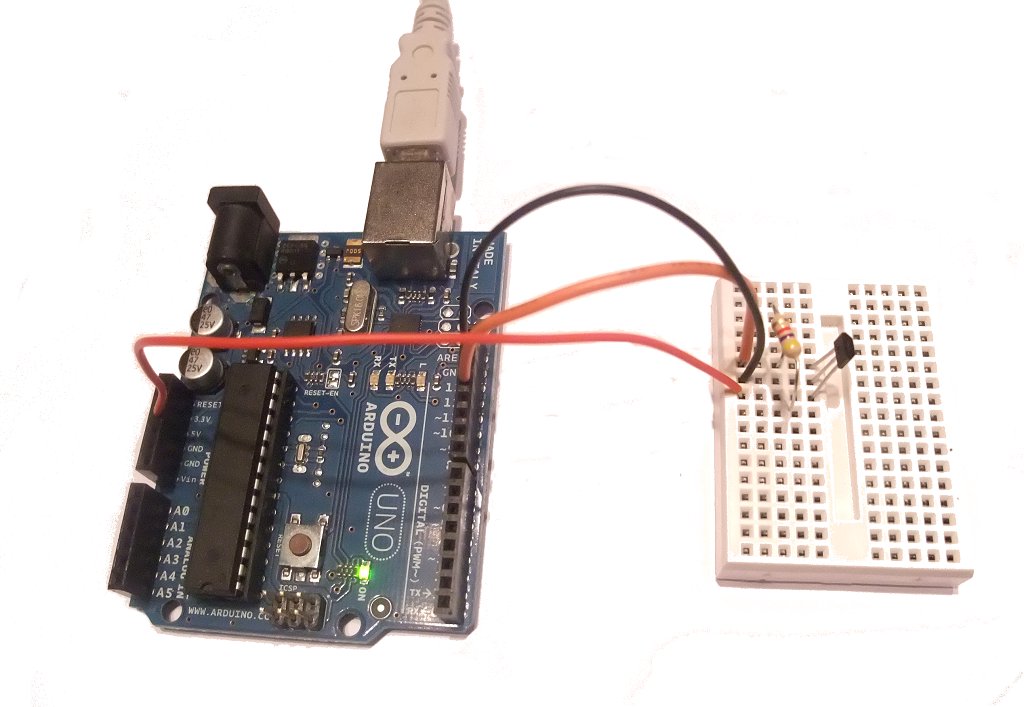
Ok, this is an easy one to make. We are going to use a hall effect switch to turn the Arduino UNO’s built-in led on and off with a magnet.

We will be using the Allegro Microsystems A1120EUA Hall Effect Switch

  • Connect pin 1 of the switch to the Arduino +5V supply (red wire)
  • Connect pin 2 to 0V (black wire)
  • Connect pin 3 to Arduino input pin 12 (orange wire)

A pull-up resistor is required between pin 1 and pin 3 to pull-up the switch’s output to +5V.

When the switch detects a magnet, it will pull it’s output pin low, which we can easily detect on the Arduino board.

hall-effect-breadboard

Here is the Arduino sketch

/*
 Hall Effect Switch
 
 Turns on and off a light emitting diode(LED) connected to digital  
 pin 13, when Hall Effect Sensor attached to pin 2 is triggered by a magnet
 
 Hall effect sensor used is the A1120EUA from Allegro Microsystems
 
 This example code is in the public domain.
 
 http://www.hobbytronics.co.uk/arduino-tutorial8-hall-effect
*/

// constants won't change. They're used here to set pin numbers:
const int hallPin = 12;     // the number of the hall effect sensor pin
const int ledPin =  13;     // the number of the LED pin
// variables will change:
int hallState = 0;          // variable for reading the hall sensor status

void setup() {
  // initialize the LED pin as an output:
  pinMode(ledPin, OUTPUT);      
  // initialize the hall effect sensor pin as an input:
  pinMode(hallPin, INPUT);     
}

void loop(){
  // read the state of the hall effect sensor:
  hallState = digitalRead(hallPin);

  if (hallState == LOW) {     
    // turn LED on:    
    digitalWrite(ledPin, HIGH);  
  } 
  else {
    // turn LED off:
    digitalWrite(ledPin, LOW); 
  }
}
În categoria Articole | Etichete | Comentariile sunt închise pentru Arduino Hall Effect Switch

Cunstruire unui receptor FM folosind modulul TEA5767

fm.mp4_snapshot_00.42_2011.02.08_14.45.25-300x168[1]

Old wish to make digitally controlled FM tuner come true when I found on Ebay cheap module with TEA5767 (Low-power FM stereo radio for handheld applications).

B1M7u9QBGkKGrHqYOKiIEV7hWnCPBMdgsNVlV_12-e1297170953699[1]

This module size is only 11.2mm x 11mm. TEA 5767 supports I2C.  Pinout and wiring:

pinout_TEA5767module[1]

For antenna i have used just 75 cm long wire, because that is 1/4 of wavelength at 100 MHz. TEA5767 doesn’t have audio amplifier, sound output level is very low, headphone can not be connected directly. During testing i had connected audio output to PC audio system.

Writing to TEA5767

Radio chip is controlled by writing 5 bytes one by one. During writing TEA5767  IC2 address is 0×60, reading – 0×61. Arduino IDE supports only 7 bit address ant last bite is assigned automatically,  so  in code 0×60 is used as address.

   frequency=87.5; //starting frequency

   frequencyB=4*(frequency*1000000+225000)/32768; //calculating PLL word

   frequencyH=frequencyB>>8;

  frequencyL=frequencyB&0XFF;

  delay(100);

  Wire.beginTransmission(0x60);   //writing TEA5767

  Wire.send(frequencyH);
  Wire.send(frequencyL);
  Wire.send(0xB0);
  Wire.send(0x10);
  Wire.send(0x00);
  Wire.endTransmission();

This is code responsible for starting frequency of FM receiver.

Frequency is controlled by 14 bit word, that is written to two 8 bit registers.

Example of word calculating is given in datasheet.

3 byte (0xB0): high side LO injection is on,.

4 byte (0×10) : Xtal is 32.768 kHz

5 byte (0×00)

Reading TEA5767

Reading is performed every time in the loop

  Wire.requestFrom(0x60,5); //reading TEA5767

  if (Wire.available()) 

  {
    for (int i=0; i<5; i++) {

      buffer[i]= Wire.receive();
    }

    freq_available=(((buffer[0]&0x3F)<<8)+buffer[1])*32768/4-225000;

    lcd.print("FM ");

    lcd.print((freq_available/1000000));

    frequencyH=((buffer[0]&0x3F));

    frequencyL=buffer[1];

    if (search_mode) {

      if(buffer[0]&0x80) search_mode=0;

    }

    if (search_mode==1) lcd.print(" SCAN");
    else {
      lcd.print("       ");
    }

    lcd.setCursor(0, 1);

    lcd.print("Level: ");
    lcd.print((buffer[3]>>4));
    lcd.print("/16 ");

    if (buffer[2]&0x80) lcd.print("STEREO   ");
    else lcd.print("MONO   ");

  }

1 byte has information about search status and part of frequency word

2 byte has remaining information about frequency

3 byte – Stereo indicator

4 byte – Signal level

5 byte – reserved

Search

Search mode is on by pressing up or down buttons longer. TEA 5767 stars scanning up or down with 100kHz steps.  Search stop level can be selected.

1 byte (Search mode on/off)

2 byte (Search up/down , stop level)

If station if found ready flag is on (1 byte).

Demo

All code

/// Arduino FM receiver with TEA5767 http://www.electronicsblog.net
#include <Wire.h>
#include <LiquidCrystal.h>

unsigned char search_mode=0;

int b=0;
int c=0;

#define Button_next 30
#define Button_prev 31

unsigned char frequencyH=0;
unsigned char frequencyL=0;

unsigned int frequencyB;
double frequency=0;

double freq_available=0; 

LiquidCrystal lcd(12, 11, 5, 4, 3, 2); 

void setup()   { 

  Wire.begin();
  lcd.begin(16, 2);

  /// buttons  

  pinMode(Button_next, INPUT);
  digitalWrite(Button_next, HIGH); //pull up resistor

  pinMode(Button_prev, INPUT);
  digitalWrite(Button_prev, HIGH); //pull up resistor

  frequency=87.5; //starting frequency

  frequencyB=4*(frequency*1000000+225000)/32768; //calculating PLL word

  frequencyH=frequencyB>>8;

  frequencyL=frequencyB&0XFF;

  delay(100);

  Wire.beginTransmission(0x60);   //writing TEA5767

  Wire.send(frequencyH);
  Wire.send(frequencyL);
  Wire.send(0xB0);
  Wire.send(0x10);
  Wire.send(0x00);
  Wire.endTransmission();

  delay(100);

}

void loop()
{

  unsigned char buffer[5];

  lcd.setCursor(0, 0);

  Wire.requestFrom(0x60,5); //reading TEA5767

  if (Wire.available()) 

  {
    for (int i=0; i<5; i++) {

      buffer[i]= Wire.receive();
    }

    freq_available=(((buffer[0]&0x3F)<<8)+buffer[1])*32768/4-225000;

    lcd.print("FM ");

    lcd.print((freq_available/1000000));

    frequencyH=((buffer[0]&0x3F));

    frequencyL=buffer[1];

    if (search_mode) {

      if(buffer[0]&0x80) search_mode=0;

    }

    if (search_mode==1) lcd.print(" SCAN");
    else {
      lcd.print("       ");
    }

    lcd.setCursor(0, 1);

    lcd.print("Level: ");
    lcd.print((buffer[3]>>4));
    lcd.print("/16 ");

    if (buffer[2]&0x80) lcd.print("STEREO   ");
    else lcd.print("MONO   ");

  }

  ///// buttons read

  //////////// button_next////////// 
  if (!digitalRead(Button_next)&&!b) {

    frequency=(freq_available/1000000)+0.05;

    frequencyB=4*(frequency*1000000+225000)/32768+1;

    frequencyH=frequencyB>>8;
    frequencyL=frequencyB&0XFF;   

    Wire.beginTransmission(0x60);   

    Wire.send(frequencyH);
    Wire.send(frequencyL);
    Wire.send(0xB0);
    Wire.send(0x1F);
    Wire.send(0x00); 

    Wire.endTransmission(); 

    //////////////////////

    b=100;

  };

  if (!digitalRead(Button_next)&&b==1) {

    ///scannnn UP

    search_mode=1;

    Wire.beginTransmission(0x60);   

    Wire.send(frequencyH+0x40);
    Wire.send(frequencyL);
    Wire.send(0xD0);
    Wire.send(0x1F);
    Wire.send(0x00); 

    Wire.endTransmission();

    /////////////////

    b=100;

  };    

  if (!b==0) b--;

  //////////// button_prev////////// 
  if (!digitalRead(Button_prev)&&!c) {

    frequency=(freq_available/1000000)-0.05;

    frequencyB=4*(frequency*1000000+225000)/32768+1;

    frequencyH=frequencyB>>8;
    frequencyL=frequencyB&0XFF;

    Wire.beginTransmission(0x60);   

    Wire.send(frequencyH);
    Wire.send(frequencyL);
    Wire.send(0xB0);
    Wire.send(0x1F);
    Wire.send(0x00); 

    Wire.endTransmission(); 

    c=100;

  };

  if (!digitalRead(Button_prev)&&c==1) {

    ///scannnn DOWN

    search_mode=1;

    Wire.beginTransmission(0x60);   

    Wire.send(frequencyH+0x40);
    Wire.send(frequencyL); 

    Wire.send(0x50);
    Wire.send(0x1F);
    Wire.send(0x00);
    Wire.endTransmission();   

    c=100;

  };          

  if (!c==0) c--;

  ////////////////////

}

Code have some problem with frequency control/indication. Button press doesn’t always adds/subtracts exactly 0,05 MHz. Also later i found in application note, that after search frequency word must be rounded and sent back to tuner, because with 32768 Hz Xtal search step is not 100 kHz, but 98.304 kHz.

Source:http://www.electronicsblog.net/arduino-fm-receiver-with-tea5767/

În categoria Articole | Etichete , | Comentariile sunt închise pentru Cunstruire unui receptor FM folosind modulul TEA5767

Monitorizarea amperajului cu ajutorul senzorului ACS712

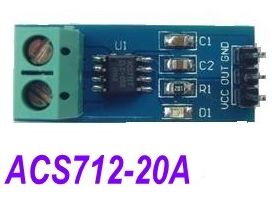
acs

int VQ;
int ACSPin = A2;
void setup() {
Serial.begin(9600);
VQ = determineVQ(ACSPin); //Quiscent output voltage – the average voltage ACS712 shows with no load (0 A)
delay(1000);
}

void loop() {
Serial.print(„ACS712@A2:”);Serial.print(readCurrent(ACSPin),3);Serial.println(” mA”);
delay(150);
}

int determineVQ(int PIN) {
Serial.print(„estimating avg. quiscent voltage:”);
long VQ = 0;
//read 5000 samples to stabilise value
for (int i=0; i<5000; i++) {
VQ += analogRead(PIN);
delay(1);//depends on sampling (on filter capacitor), can be 1/80000 (80kHz) max.
}
VQ /= 5000;
Serial.print(map(VQ, 0, 1023, 0, 5000));Serial.println(” mV”);
return int(VQ);
}

float readCurrent(int PIN) {
int current = 0;
int sensitivity = 185.0;//change this to 100 for ACS712-20A or to 66 for ACS712-30A
//read 5 samples to stabilise value
for (int i=0; i<5; i++) {
current += analogRead(PIN) – VQ;
delay(1);
}
current = map(current/5, 0, 1023, 0, 5000);
return float(current)/sensitivity;
}

În categoria Fără categorie | Etichete | Comentariile sunt închise pentru Monitorizarea amperajului cu ajutorul senzorului ACS712

Monitorizarea tensiunii unei bateri

volts[1]

Since we are involved in off grid solar power systems, we have a need to monitor battery voltage. The Arduino can do this easily with a simple voltage divider. With some simple mods, we can control loads, generators, or notifications based on battery voltage.

To read a maximum of 20vdc, R1 should be 3k ohm, R2 should be 1k ohm, and the code would be as follows:

/*
DisplayMoreThan5V sketch
prints the voltage on analog pin to the serial port
Do not connect more than 5 volts directly to an Arduino pin.
*/

const int referenceVolts = 5; // the default reference on a 5-volt board
//const float referenceVolts = 3.3; // use this for a 3.3-volt board

const int R1 = 3000; // value for a maximum voltage of 20 volts
const int R2 = 1000;
// determine by voltage divider resistors, see text
const int resistorFactor = 255 / (R2/(R1 + R2));
const int batteryPin = 0; // +V from battery is connected to analog pin 0

void setup()
{
Serial.begin(9600);
}

void loop()
{
int val = analogRead(batteryPin); // read the value from the sensor
float volts = (val / resistorFactor) * referenceVolts ; // calculate the ratio
Serial.println(volts); // print the value in volts
}


Sursa articol :http://arduinotronics.blogspot.ro/2011/03/monitoring-voltage-of-dc-battery-supply.html

În categoria Fără categorie | Comentariile sunt închise pentru Monitorizarea tensiunii unei bateri

Statie meteo -Arduino + LCD + DHT11

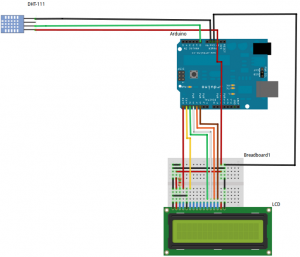
First of all, you will need to wire the DHT11 sensor and the LCD as shown in the circuit diagram below:

Fig 1: Circuit to wire up the Arduino the LCD and the DHT11 sensor

Fig 1: Circuit to wire up the Arduino the LCD and the DHT11 sensor

Loading the program to get the weather station going:

The code for reading the Sensor data and displaying it on the LCD is available here,
The code is very easy to read and understand and you can tweak it to your advantage..

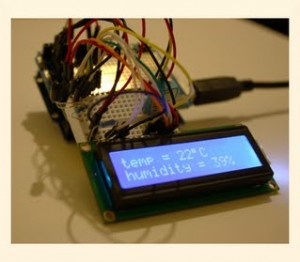
Once the code is loaded the Weather Station should be reading the Temperature and Humidity reading and displaying it on the cool blue backlight screen!!!

DESCRIPTION:

This is our original weather station kit. You will be surprised how much you can learn from it, such as how to connect sensors and write program to read the data, and display it on a LCD display. What you can do with this kit is only limited by your imagination. All the wiring diagram and datasheet is available from our website. We have include the source code in the CD to make sure that you can get it up and running once the components are hooked up. For any of our products combined shipping is welcome.   The kit includes:

  • Arduino Duemilanove
  • USB cable – Arduino ProtoShield + mini breadboard
  • Breadboard wires (approx. 70 pcs)
  • 1402 Blue backlit LCD display
  • Photo transistor 3533
  • Digital temperature and humidity sensor DHT11
  • CD with the software to get it running Its easy to add in more sensors (like windspeed etc) and customize it to do what you want!
În categoria Articole | Etichete , , , , | Comentariile sunt închise pentru Statie meteo -Arduino + LCD + DHT11

Citirea unui senzor DHT11 Temp & Humidity cu Arduino

În categoria Articole | Comentariile sunt închise pentru Citirea unui senzor DHT11 Temp & Humidity cu Arduino

Wii Motion Plus + Arduino

Ok so I, after much research, have been able to read the gyro data of the new wii motion plus peripheral with the arduino microcontroller. With this code and the code previously developed for the wii nunchuck (here), we are able to create a 6 DOF IMU for under $40. Thanks Nintendo! Best of all, everything is I2C so only 2 analog inputs (A4 and A5 needed for the wire library) are needed to read 6 sensors and no ADC conversion happens on the arduino board.

Links and Thanks:
First off, I’m going to link(and thank) a few sites that have helped me immensely with this undertaking:
Arduino.cc
original nunchuck code
Wii brew WM+ info
Propeller forums

Hardware connections:
I used full 5V TTL signals and power and have had no problems thus far (a week going strong) but if you have a 3.3v arduino or a level converter and 3.3v regulator, i would suggest that over a 5v connection. Furthermore, twi.h under the wire library does not need to be changed for my setup but might under some setups. Start with the default 100khz TWI_FREQ and if that doesnt work, use 400khz. Websites disagree about which is the proper speed for direct I2C on wii peripherals. Connections to WM+ are same as nunchuck and look like this:

| 1 2 3 |
|       |
| 6 5 4 |
|_-----_|

1 – green – data
2 – nothing
3 – red – 3.3+v
4 – yellow – clock
5 – nothing
6 – white – ground

So its pin 3 to 5v, 6 to ground, 1 to A4, and 4 to A5

Adapters such as the one sold here should (theoretically) work; I use jumper wires and hot glue

Software:

I have commented the demo code pretty well so it should be easy to follow, if not comment here or on Arduino.cc Forums->Exhibition

#include <Wire.h>
byte data[6]; //six data bytes
int yaw, pitch, roll; //three axes
int yaw0, pitch0, roll0; //calibration zeroes

void wmpOn(){
Wire.beginTransmission(0x53); //WM+ starts out deactivated at address 0x53
Wire.send(0xfe); //send 0x04 to address 0xFE to activate WM+
Wire.send(0x04);
Wire.endTransmission(); //WM+ jumps to address 0x52 and is now active
}

void wmpSendZero(){
Wire.beginTransmission(0x52); //now at address 0x52
Wire.send(0x00); //send zero to signal we want info
Wire.endTransmission();
}

void calibrateZeroes(){
for (int i=0;i<10;i++){
wmpSendZero();
Wire.requestFrom(0x52,6);
for (int i=0;i<6;i++){
data[i]=Wire.receive();
}
yaw0+=(((data[3]>>2)<<8)+data[0])/10; //average 10 readings
pitch0+=(((data[4]>>2)<<8)+data[1])/10;
roll0+=(((data[5]>>2)<<8)+data[2])/10;
}
Serial.print(„Yaw0:”);
Serial.print(yaw0);
Serial.print(” Pitch0:”);
Serial.print(pitch0);
Serial.print(” Roll0:”);
Serial.println(roll0);
}

void receiveData(){
wmpSendZero(); //send zero before each request (same as nunchuck)
Wire.requestFrom(0x52,6); //request the six bytes from the WM+
for (int i=0;i<6;i++){
data[i]=Wire.receive();
}
yaw=((data[3]>>2)<<8)+data[0]-yaw0;
pitch=((data[4]>>2)<<8)+data[1]-pitch0;
roll=((data[5]>>2)<<8)+data[2]-roll0;
}
//see http://wiibrew.org/wiki/Wiimote/Extension_Controllers#Wii_Motion_Plus
//for info on what each byte represents
void setup(){
Serial.begin(115200);
Serial.println(„WM+ tester”);
Wire.begin();
wmpOn(); //turn WM+ on
calibrateZeroes(); //calibrate zeroes
delay(1000);
}

void loop(){
receiveData(); //receive data and calculate yaw pitch and roll
Serial.print(„yaw:”);//see diagram on randomhacksofboredom.blogspot.com
Serial.print(yaw); //for info on which axis is which
Serial.print(” pitch:”);
Serial.print(pitch);
Serial.print(” roll:”);
Serial.println(roll);
delay(100);
}
Orientation:

Sorry for the arrows being all in the negative direction. Picture was done quickly.

source : randomhacksofboredom.blogspot.com

În categoria Articole | Etichete , , | Comentariile sunt închise pentru Wii Motion Plus + Arduino

Miniarduino

Nevoia de miniaturizare i-a impins pe electronisti sa creeze opere de arta.

mai jos o sa prezit proiectul  One Chip Arduino preluat de pe http://www.geocities.jp/arduino_diecimila/obaka/project-2/index_en.html

  • The circuit of LilyPad arduino is mounted on the DIP of ATmega88.
  • There are Reset-SW,Skech loading pin-header and LED of D13.
  • Using internal clock 8MHz.
  • Doesn’t put ICSP pin-header because there is no space.
  • Cost is less than 500yen($5).
  • Source code of bootloader for the ATmega88 which is made by Mr. bird.dip.jp. And recompiled it with clock 8MHz.
  • Writing the sketch uses an USB-Serial converter.

LCD Digital Clock

It used „One Chip Arduino”, LCD and RTC. A breadboard can still afford.

Arduino on Arduino

I made DIP a flat by force to hold down height. And added the pin-header of ICSP.

It’s form such as a weird bug. The downside is more weird. When it was connected by ICSP cable , and it hung down, it seems to be „that Bug” of „The MATRIX”

Connected LCD. And display „those words”.

„One Chip Arduino” which I made as a joke. But, when I use it in a breadboard it is useful because mount area is so small.

În categoria Articole, Documentatie | Comentariile sunt închise pentru Miniarduino

Modificarea servo motoarelor

Am vazut ca cele mai ieftine servo motoare nu depasesc cu mult 20 roni, dar au un dezavantaj enorm cursa prea mica si anume 60 de grade.

Am cautat pe internet si am gasit cum se poate modifica in servo motor pentru a obtine o miscare continua la 360 de grade .

sau

Voi ce parere aveti?

În categoria Articole, Documentatie | Etichete , , , | Comentariile sunt închise pentru Modificarea servo motoarelor

OBDuino

Intrucat am vazut o cerere foarte mare de montaje care sa prezinte parametri automobilelor , public aici ceva proiecte gasite pe net si care pot fi contruite cu un buget foarte mic

Introduction

The OBDuino is an in-car real-time display of various information, like speed, RPM, instant fuel consumption or average trip fuel consumption as well as others PIDs supported by the car.

Details

The name OBDuino comes from OBD which means On Board Diagnostics and from the development board which is an Arduino (or a clone).Technical info: It is based on an Atmel AVR ATMEGA168P chip that contains 16K of flash, 1K of RAM and 512bytes of EEPROM, an LCD display, 3 buttons, a few $ of electronics components.

The OBDuino connects to the car on its OBD-II plug which is, in general, under the dash. A lot of signals are on this plug as well as battery voltage and ground. Using a standard OBD-II to DB9F cable brings us what we need.

The interface to the car is made with either a Freescale MC33290 for ISO only, a Microchip 2515 for CAN only, or an ELM327 (a third-party pre-programmed PIC) that talks PWM/VPW/ISO/CAN but it is more expensive and can require more hardware work if you want to use all protocols.

OBDuino can display 4 informations at a time, and there is virtual screens to have access to others PIDs. By default there is 3 screens available so it makes 12 PIDs available quickly.

Main Hardware

The Arduino or a clone can be purchased assembled, in a kit, or you can even etch it yourself. Take the flavour you want for serial or USB depending on your PC/laptop configuration (you need the port to program the chip). All the clone should work the same, except the very small one that use 3.3V and 8MHz and even there, it should work too with some adaptation. It costs about $15-$33 depending of your choice.

To play with, you can start with a „big” board like an Arduino Diecimila or a Freeduino SB, and to integrate in the car you can use a Boarduino or an iDuino by after.

The LCD screen used is a 2 rows x 16 characters using a standard HD44780 or compatible chipset, they can be found on eBay for $4, and they exist in almost every colours as well as STN, FSTN and even OLED (although more expensive).

The 3 buttons are momentary push button switches, take the one you want. You also need a 220 ohms resistor and a PNP 2N3906 transistor or equivalent like an NTE159 to drive the LCD brightness, as it can take up to 200mA on some LCD and the pin used to drive brightness is limited to about 20mA. radio-shack has them, or online electronic parts seller like Digikey or Mouser.

With this you have the main hardware and now need the car interface.

Interfaces

The code can use multiple interface (although one at a time), you will need to make the interface specific for your car, see Interface. If your car is sold in north-america and is a 2008+ it uses CAN so you can built the interface using Microchip MCP2515 and MCP2551.

Interface connect to the Arduino on a few pins, depending on your choice, the LCD will be connected differently, see Diagram.

Menu Configuration

Role of the three buttons

realtime display menu display
LEFT rotate screen decrease, select NO
MIDDLE go into menu apply and go to next item
RIGHT rotate brightness increase, select YES
MIDDLE+RIGHT trip reset
MIDDLE+LEFT tank trip reset

Reset trip data (NO/YES)

When you press middle and right button, a screen appear: Select if you want to reset the data and press middle button to ack.

Reset tank data (NO/YES)

When you press middle and left button, a screen appear: Select if you want to reset the data and press middle button to ack.

Configuration menu (accessed by middle button)

LCD Contrast (0-100)

Set the LCD contrast from 0 to 100 in step 10

Use Metric units (NO/YES)

NO=rods and hogshead, YES=SI

Fuel/hour speed (0-255)

Speed from which the display go from L/100 or MPG, to L/h or GPH

Tank size (n.m)

Size of your tank in litres or gallon

Volume Efficiency (0-100%) (MAP only)

For vehicles with a MAP only we have to emulate the MAF. This percentage will needs adjustment after you have checked manually a few tank to approximate better the fuel consumption.

Engine Displacement (0.0-10.0) (MAP only)

For vehicles with a MAP only we have to emulate the MAF. This is the size of the engine, e.g. 2.0 for a 2Liter one.

Configure PIDs (NO/YES)

Choose if you want to configure the PIDs in the various screen.

Scr ‘n’ Corner ‘m’ (0x00-0xFF)

(if you have selected YES at the previous item) Select the PID you want to be displayed on screen ‘n’ in the corner ‘m’. A good list of PIDs is on Wikipedia here Some specials PIDs you can access (either by decreasing below 0 or by going far up):

  • 0xF0 – no display, meaning this corner will be blank, can be useful if another PID result is more than 8 characters
  • 0xF1 – Instant fuel consumption
  • 0xF2 – Average fuel consumption of the tank (since last tank reset)
  • 0xF3 – Fuel used in the current tank
  • 0xF4 – Distance done on the current tank
  • 0xF5 – Remaining distance that can be done on the current tank
  • 0xF6 – Average fuel consumption of the trip (since last trip reset)
  • 0xF7 – Fuel used for the current trip
  • 0xF8 – Distance of the current trip
  • 0xF9 – Battery voltage
  • 0xFA – CAN status, for CAN protocol only, display TX and RX errors

Some pictures of the main hardware

A clone board called the freeduino, some headers were missing when I took pictures:

The LCD screen with its wires attached, note the transistor and the resistor, covered by (not yet heated) shrink tube, on the right side:

Example of the Freeduino and LCD attached:

CAN Diagram

Here’s the proposed diagram of the Arduino board, the LCD screen, and the CAN interface.

Hardware for CAN

You need:

  1. a duino clone board, serial or USB, your choice
  2. an HD44780 compatible LCD screen 2×16
  3. a transistor 2N3906 or NTE159 or equiv
  4. three small push buttons
  5. a 220 ohms resistor
  6. the CAN interface

ISO Diagram

Here’s the proposed diagram of the Arduino board, the LCD screen, and the ISO interface.

Hardware for ISO

You need:

  1. a duino clone board, serial or USB, your choice
  2. an HD44780 compatible LCD screen 2×16
  3. a transistor 2N3906 or NTE159
  4. three small push buttons
  5. a 220 ohms resistor
  6. a Freescale MC33290 ic
  7. a 510 ohms resistor
  8. a DB9 male

Freeduino, LCD, ISO interface:

OBDuino OBD2 cable and Interfaces

Introduction

You cannot directly connect pins from the OBD-II plug to the Arduino board. You need a small interface that convert the signal.

Whatever the interface needed, you also need a cable that will bring you the signals from the OBD-II plug to your OBDuino.

For all cases: The Arduino is powered by the 12V line coming from the cable too so you need to bring some wires from the DB9M to the Arduino like this:

Arduino 12V input ------------------ DB9M pin 9 (12V Battery)
Arduino GND input ------------------ DB9M pin 2 (Chassis Ground)

Some cars have only one ground so you may have to use DB9M pin 1 instead of pin 2 to power the board or just solder pin 1 and 2 together

Cable

To keep compatibility with already existing cable, the OBDuino Interface pinout for the OBD-II to DB9F cable is wired like this:

DB9F                    OBD-II
1---------------5  (Signal ground)
2---------------4  (Chassis ground)
3---------------6  (CAN High)
4---------------7  (ISO K line)
5---------------14 (CAN Low)
6---------------10 (J1850 bus-)
7---------------2  (J1850 bus+)
8---------------15 (ISO L Line)
9---------------16 (Battery)

Do not plug it into a PC!!! This goes to an interface only!!!

Example of my home made cable:

A nice place to get OBD-II plugs and already made cable is Senso which are located in Canada.

You can also find plugs at http://www.carplugs.com/ or http://www.obd2allinone.com/sc/details.asp?item=obd2cable and others.

CAN only cable

A proposed CAN only cable, smaller and thinner, can be wired like this:

RJ-10                   OBD-II
1 (black) ------5  (Signal ground)
2 (red)---------14 (CAN Low)
3 (green)-------6  (CAN High)
4 (yellow)------16 (Battery)

source http://www.controllerareanetwork.com/CANcables.htm

Interfaces

Interface for ISO

This interface converts the ISO signals for the Arduino inputs. It consists of a small IC (Freescale MCZ33290EF), a 510 ohms resistor, a DB9M that will be plugged with the cable mentioned above, and few wires that connect to the Arduino board.

The MC33290 is a small chip, you can solder some wires on it for better handling. 

Schematic is like this:

                             MC33290
                            +-------+
Arduino pin 1 -------------5|TX  ISO|4-----------------+------- DB9M pin 4 (ISO K Line)
                            |       |                  |
Arduino pin 0 -------------6|RX  GND|3--DB9M pin 1     / between MC pin 4 and pin 1
                            |       |                  \ goes a 510 ohms resistor
Arduino 5V pin output -----7|VDD  NC|2--               /
                            |       |                  |
Arduino 5V pin output -----8|CEN VBB|1-----------------+------- DB9M pin 9 (12V Battery)
                            +-------+

Interface front:

Interface back:

Interface with ELM

CAN protocol is not easy to program so as a phase 1 I am using an ELM327 for this. This chip integrates all protocol so it could be used for ISO/VPW/PWM as well, but it’s a $32+s/h chip that add to the duino and LCD, plus a few components.

Note that for PWM/VPW it should be possible to use an ELM320 or ELM323 respectively, which is cheaper than the ELM327 and would require almost no change to the code, but you would still need to do some hadware, schematics are avalaible on some web site.

Diagram of the interface (adaptation of the generic diagram found in the PDF of the ELM327):

On the diagram, note that CAN-L (OBD2 pin 14) go to a DB9M pin 5 and CAN-H (OBD2 pin 6) go to a DB9M pin 3. +5V comes from the Arduino board.

Interface for CAN

Microchip offers solution for CAN bus, mainly their MCP2551 for the physical layer (as on the ELM327 diagram above) and their MCP2515 for the protocol. The advantage is that it costs only a few $. To manipulate CAN message, I use a free library made by Fabian Greif called libcan, his library also supports manipulation of the MCP2515 through SPI with an AVR, it’s a little bit technical but let’s say it helps me a lot as I do not have to re-invent the wheel!

Si in sfarsit si codurile

http://code.google.com/p/opengauge/source/browse/#svn%2Ftrunk%2Fobduino

http://code.google.com/p/opengauge/source/browse/#svn%2Ftrunk%2Fobduino32K

În categoria Articole | Comentariile sunt închise pentru OBDuino