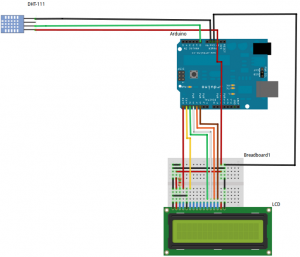
First of all, you will need to wire the DHT11 sensor and the LCD as shown in the circuit diagram below:
Loading the program to get the weather station going:
The code for reading the Sensor data and displaying it on the LCD is available here,
The code is very easy to read and understand and you can tweak it to your advantage..
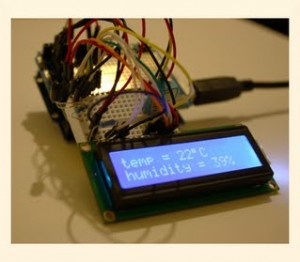
Once the code is loaded the Weather Station should be reading the Temperature and Humidity reading and displaying it on the cool blue backlight screen!!!
DESCRIPTION:
This is our original weather station kit. You will be surprised how much you can learn from it, such as how to connect sensors and write program to read the data, and display it on a LCD display. What you can do with this kit is only limited by your imagination. All the wiring diagram and datasheet is available from our website. We have include the source code in the CD to make sure that you can get it up and running once the components are hooked up. For any of our products combined shipping is welcome. The kit includes:
- Arduino Duemilanove
- USB cable – Arduino ProtoShield + mini breadboard
- Breadboard wires (approx. 70 pcs)
- 1402 Blue backlit LCD display
- Photo transistor 3533
- Digital temperature and humidity sensor DHT11
- CD with the software to get it running Its easy to add in more sensors (like windspeed etc) and customize it to do what you want!


